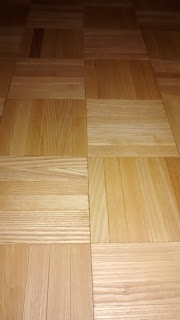
Whenever I start a DIY project, I tend to research it to death, so today is your lucky day! Just to put this in perspective, I am 55 y/o female, and I installed 350 s.f. of this flooring by myself. I took my time and did a little every day after supper and on weekends, but if you have a couple friends helping and clear your schedule, it can easily be accomplished in a weekend.
Follow these simple steps, and you can have a beautiful parquet floor in as little as a weekend!
Here is what you will need:
1/8 X 1/8 X 1/8 in. notched trowel Something like this
Wood Flooring Adhesive I used Bruce Everbond, easy to work with, and I got it at Lowe's
Palm Sander
Something to cut wood with (I used a jigsaw)
Measuring Tape
Sponge applicator
Finish (I used 1 coat of Waterlox, which brings out the grain and seals the wood. Then, I applied 2 coats of Vermont PolyWhey which leaves a satiny finish)
Call Steve for details on finishing. We can ship this with your flooring.
First, remove any old carpet or other flooring. Pull (or sink) any nails or tacks to make sure you have as smooth a surface as possible. It doesn't have to be perfect, My sub-floor was in good condition, but it did have a couple of uneven spots.
Sweep and vacuum the sub-floor to remove any and all debris and dust.
Determine the center of the room and snap intersecting chalk lines. This will be where you lay your first 4 tiles. I had to lay my floor on a diagonal because there was a gap in the sub-floor, so I did my first "row" along that line which happened to be down the middle of the room.
Lay the first 4 tiles individually to make sure they are straight. Spread some glue in the corners of the intersecting lines about the size of 1 tile, being careful not to smear your chalk. I let the glue sit for about 10 minutes. (This is called "Open time") Place your first tile square with the intersection of your chalk lines repeat with the other 3 tiles. The parquet is very easy to work with as far as closing any gaps between the tiles. Some articles I read recommend rolling over the tiles with a special floor roller, or even a rolling pin and some elbow grease. I simply stood on the freshly laid tiles. This also gives you a chance to straighten them if needed, and/or close any gaps (I just lightly "kicked" the edges when needed)

Now, you can start working your way out. Once you get comfortable spreading the glue, and get a feel for how long it takes, you can determine how large of an area you can do at a time. I started with a couple at a time, until I had a longer row. Then I could do about 10 or 12 at a time (2 rows of 5 or 6 tiles).
When you get close enough to the wall where a full tile won't fit, you will need to start cutting the tiles. Be sure to leave about 1/2 inch around the perimeter to allow for expansion. Your baseboard and/or corner round will hide the gap.

 The nice thing about the parquet is that it is made up of several small pieces of wood and held together with a webbed backing. This makes it easy to trim; simply remove some of the smaller pieces, or break it into 4 smaller squares (pictured)
To cut, first measure and mark a line on the tile with pencil or chalk. I used a jigsaw to cut my tiles and it was really easy. I put painter's tape along the line which made it easier to follow and it also kept the wood from shifting and splintering. I measured a few at a time, then marked and cut them all.
When you are done laying your floor, you can choose to sand lightly or not. It all depends on how smooth your surface was to begin with, and how well you laid your tiles. If you decide to sand, be sure to vacuum thoroughly to remove all of the sawdust before applying your finish. I followed vacuuming with a slightly damp microfiber cloth.

 I used a sponge applicator to apply my finishes. I started with the waterlox, which has a little longer drying time, but it's well worth it. Be sure to have ample ventilation when applying the waterlox.
 After that, I followed with 2 coats of Vermont PolyWhey, a milk based product that has very little odor, is fantastic to work with, and dries very quickly. You can probably do 2 coats in the same day. I let the floor "cure" for a couple days before moving the furniture back in.
I love my new floor...the ash parquet brightened up the whole room :)


